Go to Start > Run and type secpol.msc and hit enter to launch it (if it's available). You're looking for Local Policies > Security Options > User Account Control: Behavior of the elevation prompt for administrators in Admin Approval Mode > Prompt for consent for ono-Windows binaries. The default option is "Elevate without prompting". Windows Servers has a similar option that doesn't mention "Admin Approval Mode" but it does the same thing.
But if your edition of Windows doesn't include secpol.msc you will have to do some registry hack to enable it.
To create a New (Private) Site Collection, use the below 2 options (This activity is for SharePoint Administrators only). 1. from the classic SharePoint admin center >> site collections >> New >> Private Site Collection 2. from Microsoft 365 admin center >> Resources >> Sites >> Add a site, Title: "Development" Use a meaningful name as per your requirement. Web Site address: "/sites/" is commonly selected. We used 'dev' instead of 'Development' [short URLs are recommended]. Select a language: English Select a template: Team site (classic experience) [You can change any of the above options as per your requirements.]
You will see a message "Your Site Collection is being created. It can take 15 minutes or longer to complete this task.", which will disappear in few seconds (as shown below).
From classicSharePoint admin center >> site collections or from Microsoft 365 admin center >> Sites, You can only see site collections created with Template "Team site (classic experience)".
From modernSharePoint admin center >> sites >> Active sites, You can see all site collections created with all templates .
You can use tools like Share-gate or SharePoint Online Management Shellto view all the Site Collections created with all templates.
classicSharePoint admin center >> https://tenant-admin.sharepoint.com/_layouts/15/online/SiteCollections.aspx
modernSharePoint admin center >> https://tenant-admin.sharepoint.com/_layouts/15/online/AdminHome.aspx#/home
_______________________________________________________________________ Create a Subsite (This activity is for SharePoint Administrators, Site Collection Administrators and users with Full Control permissions) Go to Site contents from the Quick Launch (Left Menu) or Settings wheel icon on the top-right side.
Site contents >> New >> Subsite
Title: Any meaningful title Description: Any meaningful description. Web Site Address: We used 'tt' instead of 'Team Training' [short URLs are recommended]. Select a language: English Select a template: selected Team site (classic experience) User permissions: selected Use unique permissions Selecting Use same permissions as parent site will provide option to select existing groups from the parent dev site (we created in the above example) Selecting Use unique permissions will provide option to create new groups linked to this new site. (you still have option to use an existing group)
Navigation & Navigation Inheritance: These two options are self explanatory and are based on the business requirement.
Once completed all the above fields (as per requirement), Click on Create, will create a new Subsite. ________________________________________________________________________________ Create a Document library (This activity is for SharePoint Administrators, Site Collection Administrators and Users with Full Control permissions) Go to Site contents from the Quick Launch (Left menu) or Settings wheel icon on the top-right side.
Site contents >> New >> Document library
Name: whatever entered here will be part of URL [short URLs are recommended]. Description: Any meaningful description (is Optional). Show in site navigation: Check this box to show the library in the Quick launch (Left menu).
Click Create, will create a new Document library with ttd as Name. _____________________________________________________________________________________ Users won't prefer having short names for the libraries. We can change the Document Library Name after it is created. Go to Wheel icon >> Library settings.
Under General Settings >> List name, description and navigation >> enter meaningful Name (here, we entered Team Training Documents). You can also change Description and Navigation if needed.
Once completed, Click Save. The Quick launch (Left menu) and Document library name were updated with the new name. But the URL still shows the short name (as recommended).
By default the Document library will inherit permissions from the parent site.
Click on "Stop Inheriting Permissions" to update specific permissions for this Document library.
Permissions, Assessment and Reports are the common prerequisites for any Migration. In my case, we used Share-gate Migration Tool and completed the migration from SharePoint 20103 to SharePoint Online successfully.
Recommended Permissions Here are the recommended SharePoint permissions to use with the following features:
Copy Structure: Site Collection Administrator rights are recommended both on the source and the destination site collections in order to take advantage of all the copy options. If you are copying site collections from the web application, Farm Administrator rights are recommended both on the source and the destination Farm. For migration of managed metadata and objects where copying this data is necessary, term store administrator access is also needed.
Copy Content: Full Control permissions on both the source and destination Sites (if applicable) as well as on the selected list or library are recommended to be able to take advantage of all the copy options. Term store administrator permission is necessary for the proper migration of all managed metadata.
Management features: In order to fully exploit all of the Management module's capabilities the following permission sets are also required: Farm administrator, site collection administrator as well as full control on the web application.
Note: For OneDrive for Business operations, it is important to note that the user being used when connecting to either the source or destination server must also be set up as an administrator for every user's MySite.
Copy User Alerts: In order to copy User Alerts the permission "Manage User Alerts" must be granted to the user doing the migration at the source and destination sites. The server extension must be installed on the source and destination sites.
Remove read-only Site Collection Lock: The Read-only lock should be removed on your source Site Collection before running a migration action. Some SharePoint services do not respond correctly when the Site Collection is on read-only mode (even if they are only used to read information), and the requests will not be processed as intended.
Not removing the read-only lock will mostly affect the structural parts of your environment, like Web Parts and Site settings, but the behavior is unpredictable and is may affect more overall.
Assessment Microsoft is providing the SharePoint Assessment and Identity Management tool (free of cost) for SharePoint 2013 servers to assist in migration to SharePoint online.
Find more details in the below link. https://docs.microsoft.com/en-us/sharepointmigration/migrate-to-sharepoint-online Even if you're technically migrating from one version of SharePoint to another, they aren’t exactly the same. First, you have to take into consideration that there are different plans you can subscribe to and each with a set of features available. In my case, we were going with Office 365 E3 plan which includes SharePoint Online.
I did research and check to make sure the features we were using in SP 2013 are still available in our new Office 365 E3 plan.
Microsoft has a very detailed article which shows every single feature in a complete Edition Comparison Chart of SharePoint 2013, both On-Premises, Online and Office 365.
Share-gate Migration Tool In my case, we were using Share-gate Migration Tool to migrate from SharePoint 2013 to SharePoint Online. It has many built-in reports and we can also create custom reports. We have Inventory option to generate inventory report.
We need to run the the below given reports and make sure everything is cleared.
Orphaned User Report (we need to go thru and clean Orphaned users)
Checked Out Documents Report (We need to check in all the Checked out Documents before starting Migration)
Unused Site Report (discuss with Owners and delete unwanted sites)
Large Document Report (keep an eye on these files after migration too)
Limited Access Report (run a report and clean them)
There is a new feature in Share-gate called Insights, where you can run it on a specific farm and get some info about Missing Administrators and missing Site Owners.
Once all the above prerequisites are completed, We started the migration of Content from SP 2013 to SharePoint Online using the steps given in below link.
Microsoft introduced a new Tool called "Support and Recovery Assistant for Office 365" that helps users troubleshoot and fix issues with various Office 365 apps and services. This Tool diagnoses common Outlook issues like account setup, connectivity issues, password issues, or Outlook stops responding or crashes,to identify the root cause of these issues. https://testconnectivity.microsoft.com/
Using the above link, you can run few tests related to Exchange Server, Skype for Business, Office 365.
In 'Office 365' or 'Client' tab, you can see "Support and Recovery Assistant for Office 365", download and install it.
It will take a while preparing the Office 365 audit log.
After sometime, you will see the 'New Alert Policy' activated. Click on 'New Alert Policy'. 1. Enter Name, Description, select Alert type: Custom. When you click on 'Send this alert when...', you will see many options below where you can select them (as shown below). You will see many options related to SharePoint as listed below:
Site permissions activities
Site administration activities
Microsoft Teams activities (Back end is SharePoint)
Microsoft Flow activities (will be used in SharePoint)
Microsoft Stream video activities (Back end is SharePoint)
Microsoft Stream group channel activities (Back end is SharePoint)
Microsoft Stream general activities (Back end is SharePoint)
2. Leave Users blank (it will send alerts for all users). Type your name in Recipients and click on Save.
3. You will see the saved alerts and will receive Notifications where selected activities were performed by any users.
We can control access to SharePoint Online and OneDrive resources based on defined network locations that you trust. This is also known as location-based policy.
OneDrive is basically a SharePoint MySite. Though they have separate admin center, both are inter linked.
Note: Microsoft recommends that when a location-based policy is enabled for SharePoint, the same policy and IP address ranges should be configured for Exchange and Yammer. SharePoint relies on these services to enforce that the users of these apps are within the trusted IP range.
First, get the authorized IP address ranges of your trusted network boundary. We need to set them in SharePoint admin center or OneDrive admin center. [If you do in SharePoint admin center, it will automatically reflect in OneDrive admin center].
SP admin center
OD admin center
Any user who attempts to access SharePoint and OneDrive from outside this network boundary (using web browser, desktop app, or mobile app on any device) will be blocked and will get Access restricted message in browser.
Set a location-based policy using Windows PowerShell
Verify that there are no overlapping IP address ranges.
Double check the IP range(s) before enabling this policy to ensure you do not lock yourself out.
4. Enforce the allowable IP ranges you just set as in this example:
Set-SPOTenant -IPAddressEnforcement $true
Here are some important considerations for setting a location-based policy:
External Sharing: As per the policy, users who try to access SharePoint resources from outside the defined IP address range will be blocked, including guest users outside of the range with whom files have been externally shared.
Access from first and third-party apps: Normally, a SharePoint document can be accessed from apps like Exchange, Yammer, Skype, Teams, Planner, Flow, PowerBI, PowerApps, OneNote, and so on. When a location-based policy is enabled, apps that do not support location-based policies are blocked. The only apps that currently support location-based policies are Yammer and Exchange. This means that all other apps are blocked, even when these apps are hosted within the trusted network boundary. This is because SharePoint cannot determine whether a user of these apps is within the trusted boundary.
For Example:You cannot add OneNote in the Microsoft Teams. When you try to add OneNote in Microsoft Teams, it shows you permission error even though you were owner for that Team.
Access from dynamic IP ranges: Several services and providers host apps which have dynamic originating IP addresses. For example, a service that accesses SharePoint while running from one Azure data center may start running from a different data center due to a failover condition or other reason, thus dynamically changing its IP address. The location-based conditional access policy relies on fixed, trusted IP address ranges. If the IP address range cannot be determined up front, location-based policy may not be an option for your environment.
While working on a document edited in a browser users will receive a Session Expired or Timeout message after around 15 minutes. All users were using Internet Explorer 11.x
In my situation, this was caused because I had set an IP address restriction on my own SharePoint site (property IPAddressEnforcement). Setting the IP address restriction through the UI also sets a timeout value for IPAddressWACTokenLifetime to 15 minutes. Below are the steps to increase the Session Time out by updating the IPAddressWACTokenLifetime value. You should have SharePoint Online Management Shell to run these PowerShell commands. Please Download using the below link. (SharePoint Online Management Shell works perfectly with Windows 10. You will see many error messages with Windows 7) https://www.microsoft.com/en-us/download/details.aspx?id=35588 1. Connect to SharePoint admin center and enter admin credentials. Connect-SPOService https://TENANTNAME-admin.sharepoint.com/
2. Run Command Get-SPOTenant | fl It will provide many Properties of the SharePoint admin center (as shown below).
3. Check if the IPAddressEnforcement:True and IPAddressWACTokenLifeTime:15 (15 minutes is the default time setup when IP Address Enforcement is True) 4. To increase the Session Time (i.e., IPAddressWACTokenLifeTime , we need to run the below PowerShell Command )
Set-SPOTenant –IPAddressWACTokenLifeTime 30
5. Run Command Get-SPOTenant | fl to verify the property again.
Now the Session Expired or Timeout was increased to 30 minutes.
This will help SharePoint Users with Windows 10 OS, while using Windows Explorer thru MOSS 2007, SPS2010 and SharePoint Online.
Microsoft added a new feature to Windows 10 OS to resolve one of the longest standing issues (260 character limit) that users experienced when using Windows Explorer.
Windows by default has a limit of 260 characters which led to all kinds of issues including the inability to run operations on files stored under paths exceeding the limit, issues with the extraction of files, and issues with transferring files from systems that have no such limit.
Enable support for long paths using the Group Policy Editor. (This policy is available in Windows 10 only, not in Windows 7)
Tap on the Windows-key, type gpedit.msc, and hit enter.
Confirm the UAC prompt if it appears.
Use the hierarchy on the left to navigate to the following policy: Local Computer Policy > Computer Configuration > Administrative Templates > System > Filesystem
Locate the "Enable NTFS Win32 long paths" policy and double-click on it.
Switch its state to Enabled.
Click OK.
Enabling NTFS long paths will allow manifested win32 applications and Windows Store applications to access paths beyond the normal 260 char limit per node. Enabling this setting will cause the long paths to be accessible within the process.
If a work or school account is deleted from the Microsoft Office 365 admin center, or is removed through Active Directory synchronization, their OneDrive site is marked for deletion and is available for 30 days to retain files in OneDrive after the user account is marked for deletion (as per the default setting in OneDrive admin center).
After a 30 day retention period, their site is moved to their recycle bin. This recycle bin is not visible to Admin users, and it is not possible to restore or recover deleted OneDrive sites through the Admin UI.
Below are messages you see while manually deleting user from O365 Active Users.
Note: OneDrive sites remain in the recycle bin for 93 days before being permanently deleted. _______________________________________________________________
Recovery process
SharePoint Administrators should use PowerShell to confirm that the OneDrive site is in the recycle bin and is available to be restored.
(Windows 10 is recommended OS for using SharePoint Online Management Shell. You might see more issues with Windows 7.)
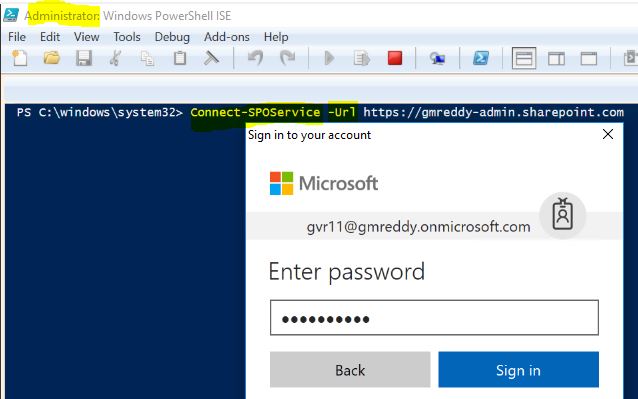
1. Open PowerShell as Administrator 2. Connect to the service: Connect-SPOService -Url <https://yourdomain-admin.sharepoint.com> 3. Sign in with SharePoint administrator credentials
4. Determine if the site is available for restore
If you do not know the URL of the deleted site, use the following command Get-SPODeletedSite -IncludeOnlyPersonalSite | FT url
If you know the URL of the delete site, use the following command Get-SPODeletedSite -Identity <ODBSiteUrl>
If the site appears in the results, it is in the recycle bin and available to be restored. Otherwise the Site is permanently deleted and you cannot restore it.
Once the site is located, restore the site to an active state Restore-SPODeletedSite -Identity <ODBSiteURL>
Assign an owner to the site to access the desired data Set-SPOUser -Site <ODBSiteURL> -LoginName <UPNofDesiredAdmin> -IsSiteCollectionAdmin $True
You will now be able to access the restored site with the user that was assigned as site collection administrator and access any desired data.
Once you have obtained the desired data from the restored site, you will want to delete the site to prevent an orphaned site from remaining in your tenant.
Note: This deletion is permanent, and the site will not be available to be restored again
Remove-SPOSite -Identity <ODBSiteURL> Once you all the activities are performed, don't forget to disconnect from the SPOService using the below PowerShell command.


