We apply Company logos across all SharePoint Online Site Collections and subsites. When a new logo is designed, I receive requests to update them. The PowerShell script below simplifies this process.
While running this script, you will get a window prompt to login with your Global Admin/SharePoint Admin account. Enter credentials and proceed forward.
When I received this requirement, I reviewed several blogs and Google AI instructions, but none addressed my goal. After further research, I was able to achieve it and would like to share an article that aims to enable the 'Filter by' option for the Name column.
When a document library is first created in Modern SharePoint Online, you'll see the Name, Modified, and Modified by columns, with All Documents set as the default view.
The 'Filter by' option is available for the Modified and Modified by columns, but not for the Name column.
Top right down to '+ Create or upload' you will see Options (click on it) > Edit View.
In Edit View, under columns, after scrolling down you will notice three types of Name columns as shown below.
1. In Display, Uncheck,Name (linked to document with edit menu).
2. In Display, Check,Name (for use in forms) replace the Position from left.
3. Click OK to save the modifications.
Once redirected to the view, you will notice Filter by option for the Name column.
If your tenant has multi-factor authentication turned on, your Internet Explorer was disabled, with Edge as default browser, and you were trying to use SharePoint Designer 2013, you will encounter the error shown below.
"The Web Server does not appear to have any authentication methods enabled. It asked for user authentication, but did not send a WWW-Authenticate header."
This was because Office 2016 and Older Versions use Basic Authentication method.
As SharePoint Designer 2013 was part of Office 2013 clients, and to overcome this, you need to enable Modern Authentication.
To enable modern authentication for any devices running Windows, you need to set the following registry keys.
Once the above Registry Keys were added with Hexadecimal value 1, then it should look as shown below.
Open the SharePoint Designer 2013, Go to Account. It should show your login info.
Now try to open the SharePoint Online Site Collection, it opened like charm.
Incoming E-Mail Settings was deprecated in SharePoint Online. In this scenario we are trying to re-create this feature using Exchange Online and Power Automate.
Fill the mandatory fields and click on Create. [Alias can be left blank. No blanks if entered]
Shared mailbox was created successfully.
You can use 'Add users to this mailbox' to add users to manage the Shared Mailbox as shown in above image or use 'Manage mailbox delegation' as shown in the below image to add users to manage the Shared mailbox.
Add User to Read and manage the Shared Mailbox.
Now the Shared Mailbox is ready to use.
If MFA is enabled on your tenant, please disable MFA for the Shared Mailbox account.
Step 2: Go to M365 admin center > Users > Active Users (using the below link).
Search for the Shared Mailbox you created. Select, click on Reset password to set a new password, so that you can access the Shared Mailbox.
Step 3: From App Launcher Click on Power Automate
or login into https://us.flow.microsoft.com/en-us/. Go to Templates and search for 'save my email attachment'. Click on the 'Save my email attachment to Sharepoint document library' template.
Once the template is loaded, click on Fix connection...
You will see the below screen, Click on Sign in
Pick the SharedMailBox account you created above, for the 3 Connections to be fixed.
Once the Connections were successfully completed, Click on Continue
Click on the (. . .) on top-right of each workflow item to make sure SharedMailbox account was connected under My connections.
Click on the Folder icon and select Inbox. Make sure Only with Attachments and Include Attachments is Yes (as shown below).
Select the Site Address from Dropdown or by typing the Site URL. Click on the Folder icon and select the Document Library in the Folder Path.
Verify and update To, Subject and Body fields as per your requirement. This flow will send an email notification in case of any error occurred.
On top-right below your name click on Flow Checker to view any Errors or Warnings.
On top-right or at the end of the Flow, Click on Save to save the Flow.
On top-left you will see a message 'Your flow is ready to go' as shown below.
Click on My flows, you will see the saved flow under Cloud flows.
Step 4: Verification
Sent email from my Gmail account to the SharedMailbox account.
It took more than 15 mins for the attachment to appear in the SharePoint Library.
As of now, this is only the Workaround solution found to replace the Incoming E-Mail Settings feature.
The main reason for this Integration is to use SharePoint Online as Document Repository. All the Documents upload in CRM Online will be stored in SharePoint Online.
NOTE: In the below steps, we used our development tenant. Please change the tenant while copying URLs.
For this, first create a Site Collection in SharePoint Online.
Click on 'New', to create a new SharePoint Site record.
Enter the below Required fields.
First, we need to create a Parent Site recordfilling only Absolute URL with SPO Root Site. 'List Component is installed' should be unchecked (for SharePoint Online). 'Allow Embedding of the Power BI Reports' is Optional.
then, we need to create a Site record filling parent Site and Relative URL. 'List Component is installed' should be unchecked (for SharePoint Online). 'Allow Embedding of the Power BI Reports' is Optional.
Select Active SharePoint Sites created and click on 'Activate'
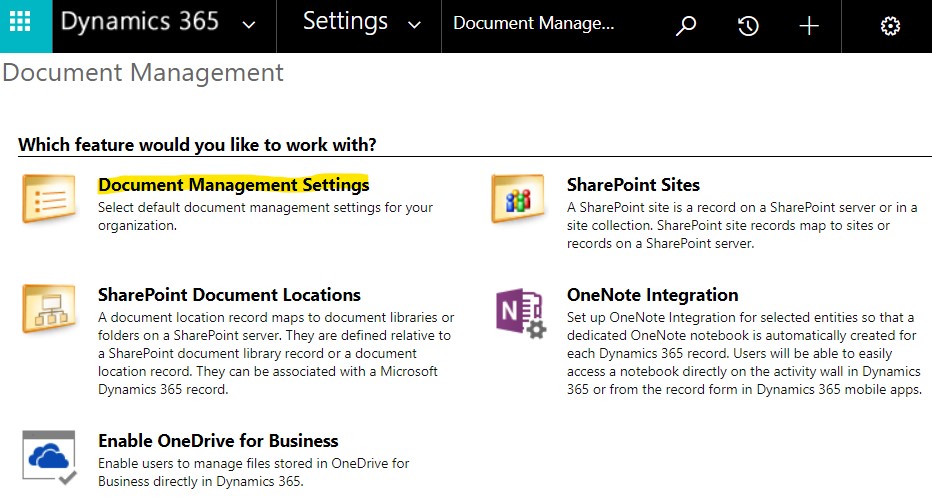
Again, go to Dynamics 365 > Settings > Document Management (under System).