If your tenant has multi-factor authentication turned on, your Internet Explorer was disabled, with Edge as default browser, and you were trying to use SharePoint Designer 2013, you will encounter the error shown below.
"The Web Server does not appear to have any authentication methods enabled. It asked for user authentication, but did not send a WWW-Authenticate header."
This was because Office 2016 and Older Versions use Basic Authentication method.
As SharePoint Designer 2013 was part of Office 2013 clients, and to overcome this, you need to enable Modern Authentication.
To enable modern authentication for any devices running Windows, you need to set the following registry keys.
Once the above Registry Keys were added with Hexadecimal value 1, then it should look as shown below.
Open the SharePoint Designer 2013, Go to Account. It should show your login info.
Now try to open the SharePoint Online Site Collection, it opened like charm.
Multi factor Authentication (MFA) Setup was done successfully. I was using the Microsoft Authenticator App on mobile to approve/reject the Notifications for 2nd step Verification.
After a couple of months, I formatted my mobile after getting a couple SMiShing messages. Installed the Microsoft Authenticator App, couldn't add my work account as it was asking to scan QR code or enter code manually.How to achieve this?
To perform the following steps, you should be Global Admininstrator of your tenant.
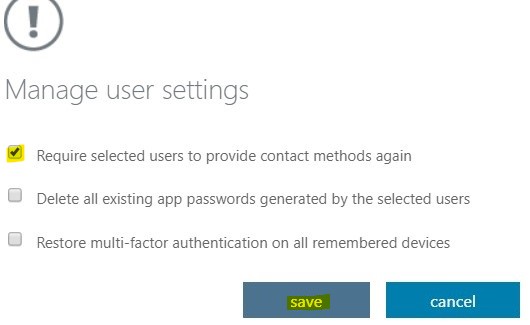
Select the user and Click on Manage user settings. Select 'Require selected users to provide contact methods again' and Click Save.
'Delete all existing app passwords generated by the selected users'. This option can be used issues with app passwords. "Restore multi-factor authentication on all remembered devices". This option can be used when users are using more than 2 devices. Install Microsoft Authenticator app on your mobile Android or iPhone.
Click on https://www.office.com/ and enter your credentials. You will see a message as shown below. Click Next,
Select Receive notifications for verification, Click Set up Open Microsoft Authenticator app on your mobile. Click + on the right-top corner and choose "Work or school account"
Follow Instructions 2, 3 on this screen. Scan the QR Code image (Shown above).
Your account gets added and you will receive notification for verification, Approve it. Once Verification successful, Click on Done.
We can perform all activities thru SharePoint admin center. But Powershell has more features and is very effective for code lovers. First, install SharePoint Online Management Shell 64-bit on your PC and install the SPO modules using below commands.
(Note: use -Force parameter to install new version if old version already exists).
Below is the default syntax. We can pick required parameters. (Note: You must be a SharePoint Online global administrator to run the cmdlet).
Connect-SPOService
-AuthenticationUrl <String>
[-ClientTag <String>]
[-Credential <CredentialCmdletPipeBind>]
[-Region <AADCrossTenantAuthenticationLocation>]
-Url <UrlCmdletPipeBind>
[<CommonParameters>]
The below customized Powershell cmdlet as per our requirement.
Connect-SPOService -Url https://gurram-admin.sharepoint.com -credential gvr@gurram.onmicrosoft.com Enter the credentials and click OK to connect.
Sometimes, it might show error message (as shown below).
In that case, just use Connect-SPOServiceor use Connect-SPOService -Url https://gurram-admin.sharepoint.com , enter the URL /credentials in the prompted window. You are Connected.
With MFA enabled, once you run the above cmdlet and enter credentials, you will get below message and approve notification to MSFT Authenticator app on your mobile.
Approve on mobile, you are Connected.
_________________________________________________
For MFA (Multi Factor Authentication)
To active MFA, go to https://portal.azure.com >> Azure Active Directory >> MFA (under Security) >> Click on Activate (will take a while to get activated).
You will see the below Notification once successfully activated.
Go back to Azure Active Directory >> MFA (under Security), click on Additional cloud-based MFA settings.
Days before a device must re-authenticate (1-60): This is an awesome feature to enable saving users from too many requests.
select the required settings and click on Save, and Close.
Go to https://portal.azure.com >> Intune App Protection >> App Protection policies, Created two policies for Android and iOS devices.
Go to M365 Device Management >> Conditional Access >> Policies. Create new Policy or enable existing.
EnabledEnd user protection policy and Require MFA for Admins policies.
____________________________________________
Add account in Microsoft Authenticator app
Note: Once MFA is enabled for first time, you can skip to register for 14 days.
1. Open MS Teams web client and enter your credentials. You will see a message as shown below. Click Next,
Select Receive notifications for verification under Mobile app, Click Set up
Follow Instructions 1, 2, 3 on this screen.
Install Microsoft Authenticator app on your mobile. Click + on the right-top corner and choose "Work or school account"
Scan the QR Code image (Shown above). Your account gets added and you will receive notification for verification, Approve it.
Once Verification successful, Click on Done.
With MFA enabled, once you login into any M365 apps, you will get below message and approve notification to MSFT Authenticator app on your mobile.
As we enabled Days before a device must re-authenticate (1-60): 10, if you check the box (as shown above), you will not see this Notification for another 10 days.


