SharePoint (2003 thru Online): May 2018

Thursday, May 31, 2018

Restrict access to SharePoint Online and OneDrive based on network

We can control access to SharePoint Online and OneDrive resources based on defined network locations that you trust. This is also known as location-based policy.


OneDrive is basically a SharePoint MySite. Though they have separate admin center, both are inter linked.


Note: Microsoft recommends that when a location-based policy is enabled for SharePoint, the same policy and IP address ranges should be configured for Exchange and Yammer. SharePoint relies on these services to enforce that the users of these apps are within the trusted IP range. 


First, get the authorized IP address ranges of your trusted network boundary. We need to set them in SharePoint admin center or OneDrive admin center. [If you do in SharePoint admin center, it will automatically reflect in OneDrive admin center].


SP admin center


OD admin center


Any user who attempts to access SharePoint and OneDrive from outside this network boundary (using web browser, desktop app, or mobile app on any device) will be blocked and will get Access restricted message in browser.


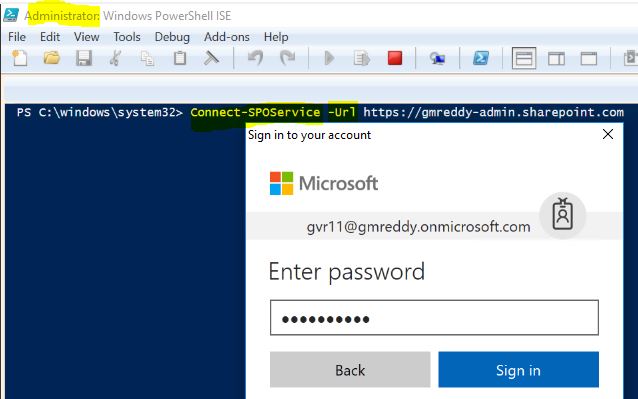
Set a location-based policy using Windows PowerShell


2. Connect to SharePoint Online as a global admin or SharePoint admin in Office 365. To learn how, see Getting started with SharePoint Online Management Shell

3. Run Set-SPOTenant to specify your allowed IP addresses, as in this example (replace the example IP address "131.102.0.0/16" with your own):


  Set-SPOTenant -IPAddressAllowList "131.102.0.0/16"


Important Note: 

  • Use IPv4 or IPv6 formats ony.
  • Verify that there are no overlapping IP address ranges.
  • Double check the IP range(s) before enabling this policy to ensure you do not lock yourself out. 
4. Enforce the allowable IP ranges you just set as in this example:
  
      Set-SPOTenant -IPAddressEnforcement $true


Here are some important considerations for setting a location-based policy: 


External Sharing: As per the policy, users who try to access SharePoint resources from outside the defined IP address range will be blocked, including guest users outside of the range with whom files have been externally shared.

Access from first and third-party apps: Normally, a SharePoint document can be accessed from apps like Exchange, Yammer, Skype, Teams, Planner, Flow, PowerBI, PowerApps, OneNote, and so on. When a location-based policy is enabled, apps that do not support location-based policies are blocked. The only apps that currently support location-based policies are Yammer and Exchange. This means that all other apps are blocked, even when these apps are hosted within the trusted network boundary. This is because SharePoint cannot determine whether a user of these apps is within the trusted boundary. 


For Example: You cannot add OneNote in the Microsoft Teams. When you try to add OneNote in Microsoft Teams, it shows you permission error even though you were owner for that Team.

Access from dynamic IP ranges: Several services and providers host apps which have dynamic originating IP addresses. For example, a service that accesses SharePoint while running from one Azure data center may start running from a different data center due to a failover condition or other reason, thus dynamically changing its IP address. The location-based conditional access policy relies on fixed, trusted IP address ranges. If the IP address range cannot be determined up front, location-based policy may not be an option for your environment.

Wednesday, May 30, 2018

SharePoint Online Session Expired

While working on a document edited in a browser users will receive a Session Expired or Timeout message after around 15 minutes. All users were using Internet Explorer 11.x


In my situation, this was caused because I had set an IP address restriction on my own SharePoint site (property IPAddressEnforcement).  Setting the IP address restriction through the UI also sets a timeout value for IPAddressWACTokenLifetime to 15 minutes. 


Below are the steps to increase the Session Time out by updating the IPAddressWACTokenLifetime value.


You should have SharePoint Online Management Shell to run these PowerShell commands.
Please Download using the below link. (SharePoint Online Management Shell works perfectly with Windows 10. You will see many error messages with Windows 7

https://www.microsoft.com/en-us/download/details.aspx?id=35588

1. Connect to SharePoint admin center and enter admin credentials.

    Connect-SPOService https://TENANTNAME-admin.sharepoint.com/


2. Run Command Get-SPOTenant | fl

    It will provide many Properties of the SharePoint admin center (as shown below).


3. Check if the IPAddressEnforcement: True and IPAddressWACTokenLifeTime: 15
     (15 minutes is the default time setup when IP Address Enforcement is True)

4. To increase the Session Time (i.e., IPAddressWACTokenLifeTime , we need to run the below PowerShell Command )


Set-SPOTenant –IPAddressWACTokenLifeTime 30


5. Run Command Get-SPOTenant | fl  to verify the property again.


Now the Session Expired or Timeout was increased to 30 minutes.

Enable NTFS long paths policy

This will help SharePoint Users with Windows 10 OS, while using Windows Explorer thru MOSS 2007, SPS2010 and SharePoint Online.


Microsoft added a new feature to Windows 10 OS to resolve one of the longest standing issues (260 character limit) that users experienced when using Windows Explorer.

Windows by default has a limit of 260 characters which led to all kinds of issues including the inability to run operations on files stored under paths exceeding the limit, issues with the extraction of files, and issues with transferring files from systems that have no such limit.

Enable support for long paths using the Group Policy Editor.
(This policy is available in Windows 10 only, not in Windows 7)
  1. Tap on the Windows-key, type gpedit.msc, and hit enter.
  2. Confirm the UAC prompt if it appears.
  3. Use the hierarchy on the left to navigate to the following policy: Local Computer Policy > Computer Configuration > Administrative Templates > System > Filesystem
  4. Locate the "Enable NTFS Win32 long paths" policy and double-click on it.
  5. Switch its state to Enabled.
  6. Click OK.


Enabling NTFS long paths will allow manifested win32 applications and Windows Store applications to access paths beyond the normal 260 char limit per node. Enabling this setting will cause the long paths to be accessible within the process.

Wednesday, May 16, 2018

Restoring a deleted OneDrive for Business site

If a work or school account is deleted from the Microsoft Office 365 admin center, or is removed through Active Directory synchronization, their OneDrive site is marked for deletion and is available for 30 days to retain files in OneDrive after the user account is marked for deletion (as per the default setting in OneDrive admin center).

https://admin.onedrive.com/?v=StorageSettings

After a 30 day retention period, their site is moved to their recycle bin. This recycle bin is not visible to Admin users, and it is not possible to restore or recover deleted OneDrive sites through the Admin UI.

Below are messages you see while manually deleting user from O365 Active Users.


Note: OneDrive sites remain in the recycle bin for 93 days before being permanently deleted.
_______________________________________________________________

Recovery process

SharePoint Administrators should use PowerShell to confirm that the OneDrive site is in the recycle bin and is available to be restored.

Note: To perform the steps below you will need to have the SharePoint Online Management Shell installed. If you have issues with SharePoint Online Management Shell, try to install SharePoint Online Client Components SDK

(Windows 10 is recommended OS for using SharePoint Online Management Shell. You might see more issues with Windows 7.)
 
1. Open PowerShell as Administrator
2. Connect to the service: Connect-SPOService -Url <https://yourdomain-admin.sharepoint.com>
3. Sign in with SharePoint administrator credentials


4. Determine if the site is available for restore
      If you do not know the URL of the deleted site, use the following command
      Get-SPODeletedSite -IncludeOnlyPersonalSite | FT url

      If you know the URL of the delete site, use the following command
      Get-SPODeletedSite -Identity <ODBSiteUrl>

If the site appears in the results, it is in the recycle bin and available to be restored.
Otherwise the Site is permanently deleted and you cannot restore it.

      Once the site is located, restore the site to an active state
      Restore-SPODeletedSite -Identity <ODBSiteURL>
 

       Assign an owner to the site to access the desired data
       Set-SPOUser -Site <ODBSiteURL> -LoginName <UPNofDesiredAdmin> -IsSiteCollectionAdmin $True

You will now be able to access the restored site with the user that was assigned as site collection administrator and access any desired data.


_______________________________________________________________

Action after data recovery

Once you have obtained the desired data from the restored site, you will want to delete the site to prevent an orphaned site from remaining in your tenant.

Note: This deletion is permanent, and the site will not be available to be restored again

Remove-SPOSite -Identity <ODBSiteURL>


Once you all the activities are performed, don't forget to disconnect from the SPOService using the below PowerShell command.

Disconnect-SPOService