This article explains how to assign an administrative role to a user in Azure Active Directory (Azure AD). Added users don't have administrator permissions by default, but you can assign roles to them at any time.
Assign a role to a user
Sign in to the Azure AD admin center with an account that's a global admin for the directory.
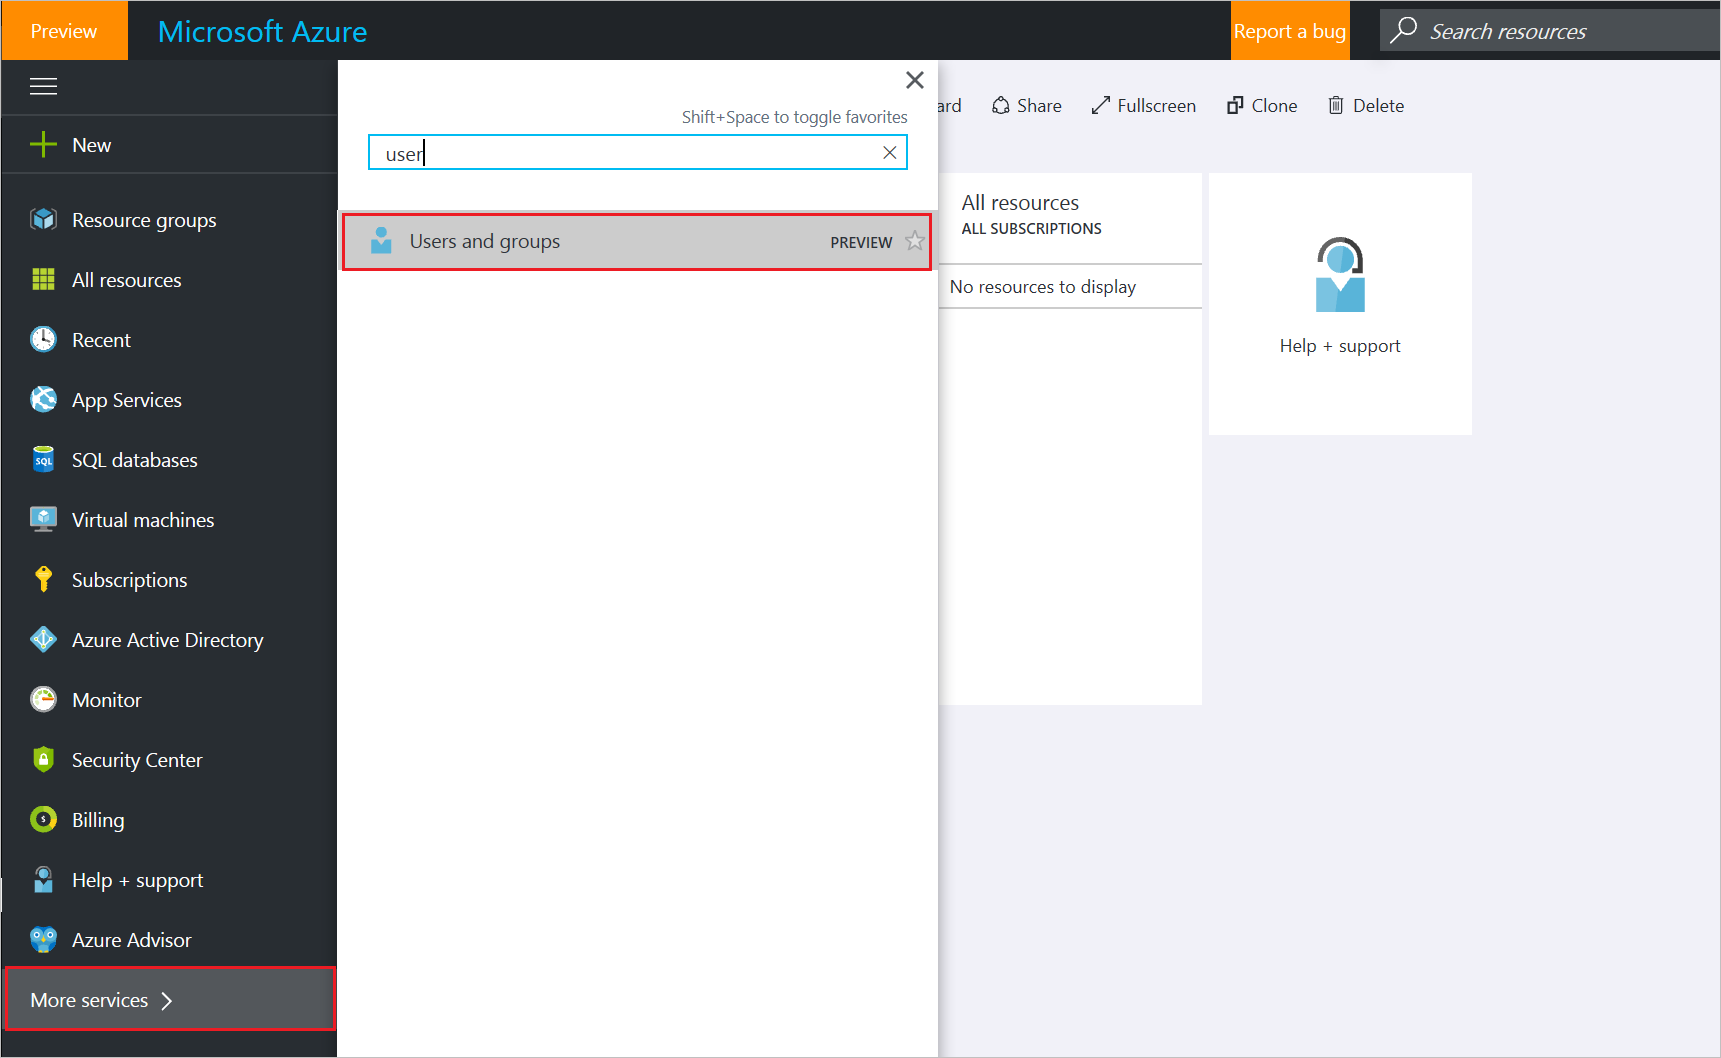
Select Users and groups.
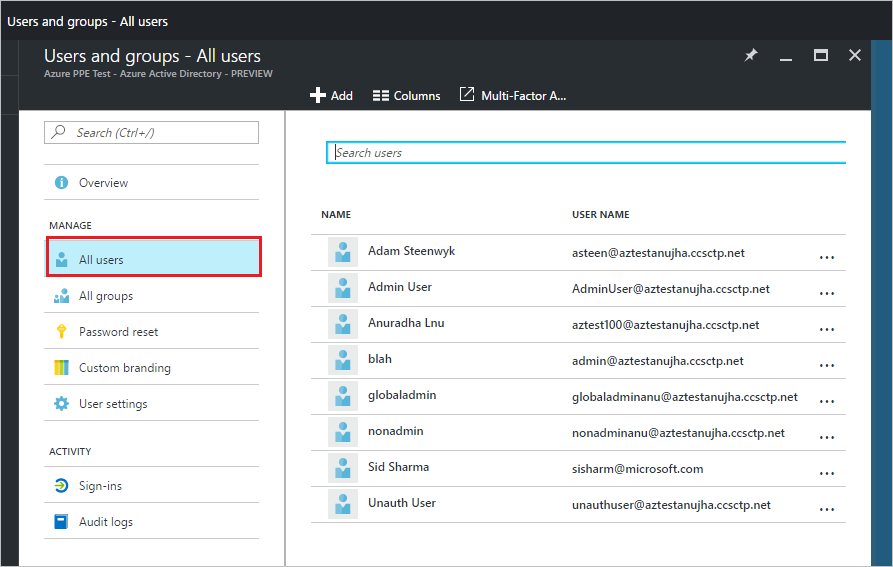
Select All users.
Select a user from the list.
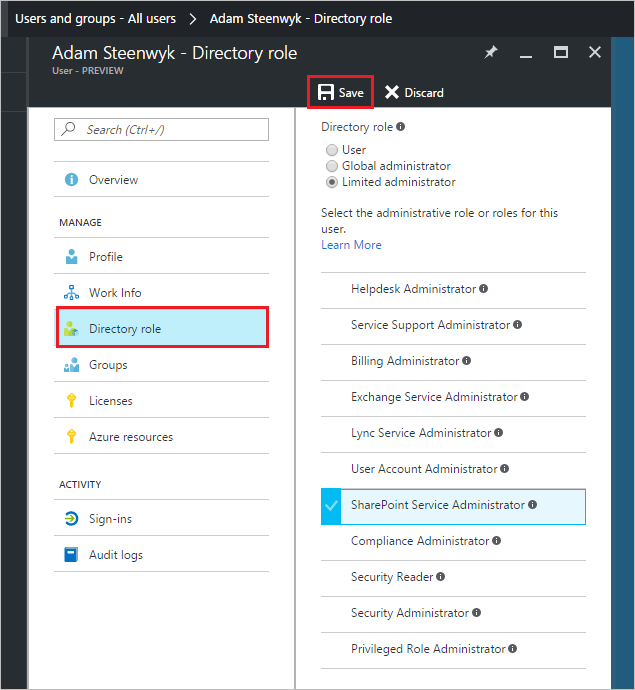
For the selected user, select Directory role and then assign the user to a role from the Directory role list. For more information about user and administrator roles, see Assigning administrator roles in Azure AD.
NOTE: Run the below PS Command in Windows PowerShell ISE thru Admin mode. Install PowerShellGet Install-Module PowerShellGet -Force While Loading, you will see a couple of dialog boxes for Acceptance, Click on Yes to All
Install Azure PowerShell Install-Module -Name AzureRM -AllowClobber While Loading, you will see a couple of dialog boxes for Acceptance, Click on Yes to All
In Windows 10: Everything works fine. In Windows 7: Turn on Script Execution in both the Locations given below.
Local Computer Policy\Computer Configuration\ Administrative Templates\ Windows Components\Windows PowerShell
Local Computer Policy\User Configuration\ Administrative Templates\ Windows Components\Windows PowerShell
Manage Execution Policy To get all of the execution policies that affect the current session and displays them in precedence order, type:
Get-ExecutionPolicy -List To set the execution policy in a particular scope, type: Set-ExecutionPolicy AllSigned -Scope CurrentUser Set-ExecutionPolicy AllSigned -Scope LocalMachine Load the AzureRM module Import-Module -Name AzureRM While Loading, you will see a couple of dialog boxes for Acceptance, Click on Yes to All
Install the Azure AD Module Install-Module MSOnline While Loading, you will see a couple of dialog boxes for Acceptance, Click on Yes to All
MSOnline Public Preview module Install-Module AzureADPreview While Loading, you will see a couple of dialog boxes for Acceptance, Click on Yes to All
Microsoft SharePoint Online Services Module for Windows PowerShell Install-Module -Name Microsoft.Online.SharePoint.PowerShellWhile Loading, you will see a couple of dialog boxes for Acceptance, Click on Yes to All
If you notice any warning as shown below, add -Force to the end of the above Powershell command.
Restart the Windows PowerShell ISE after completion. Now you can see all the Modules loaded.
You can also expand Products to buy a version of Power BI.
Enable the content pack
To instantiate the content pack, you have to be either a global administrator, Exchange administrator, Skype for Business administrator, or SharePoint administrator.
Sign in with your admin credentials, and go to the Admin center.
In the admin center, expand the left nav, and go to Reports > Usage.
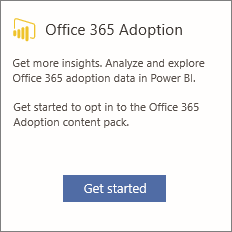
On the Usage page, locate the Office 365 Adoption card, and choose Get started.
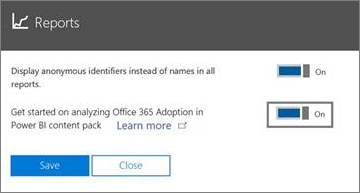
On the Reports panel that opens, set Make data available to the Office 365 Adoption content pack for Power BI to On > Save.
This initiates the data collection. [which normally takes between 2 and 48 hours depending on the size of the tenant]
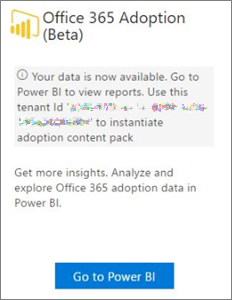
When the data collection is complete, the Go to Power BI button is enabled (no longer gray), and the card includes a tenant Id.
Copy the tenant Id and choose Go to Power BI.
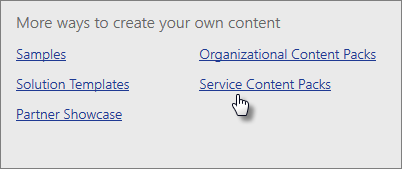
When you get to Power BI, sign in. Choose Get Data, then under Content Pack Library choose Services > Get.
In the Apps tab, type Office 365 in the search box and then select Office 365 Adoption Preview > Get it now.
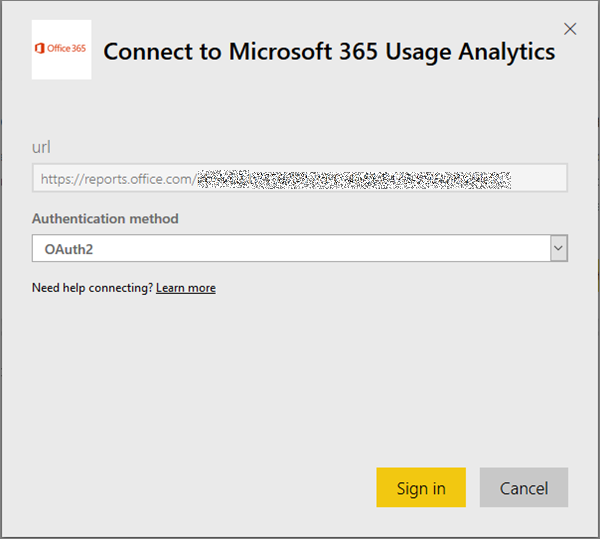
On the Connect to Office 365 Adoption screen, type in the tenant Id you copied in step (5) > Next.
On the next screen, choose oAuth2 as the Authentication method > Sign in. If you choose any other authentication method, the connection to the content pack will fail.
Once the content pack is instantiated the Office 365 Adoption dashboard will be available in Power BI on the web. The initial loading of the dashboard will take between 2 to 30 minutes
To make the data that is collected for all reports anonymous, you have to be a global administrator. This will hide identifiable information such as user, group and site names in reports and in the content pack .
In the admin center, expand the left nav, and go to Settings > Services & add-ins.
On the Services & add-ins page choose Reports, and then turn on the toggle next to Display anonymous identifiers instead of names in all reports.This setting gets applied both to the usage reports as well as to the content pack.
You can enable audit logs at Site Collection level in SharePoint Online. Go to Site Settings >> Site Collection Administration >> Site collection audit settings
Automatically trim the audit log for this site is Yes by default and grayed out.
You can choose the number of days between 1-90.
Path of the default Maintenance Log Library. [_catalogs/MaintenanceLogs]
Customize SharePoint Online Sign-in Page In SharePoint Online you can brand your own sign-in page using the Azure Active Directory (AD) subscription that is included with your Office 365 subscription from the Azure AD thru the Admin Centers.
You can directly go to https://portal.azure.com/ if you already have access. Click on Azure Active Directory, select Company Branding then Edit.
Below are the options you should be able to update.
Sign-in page background image
The banner logo
User name hint
Sign-in page Text
Under Advanced settings, you have 4 more options
Sign-in page background color
Square logo image
Square logo image, dark theme
Show option to remain signed in
Save the page once completed. Below are the updated Options.
Solution:We have two scenarios for accessing OneDrive. 1. Login thru the Client installed with Office Pro plus, which
creates a local OneDrive Folder. 2. Login thru the Web, creates a personal site under SharePoint 'My Sites' Site Collection. Both are interdependent. Because Sync of Items plays a key role. Though, you install OneDrive Client and try to login, you cannot login because you are not provisioned to create Personal Site. If you click on OneDrive icon in web, it may re-direct to Delve (https://delve.office.com/).
Enable "Create Personal Site" option. Go to SharePoint admin center >> user profiles >> Manage User Permissions
Note: We can also include specific groups, if not needed for Everyone. After enabling the above Permissions, You should be able to login into the OneDrive with your Office Account and also Personal Account. 1. Login with Office Account creates a OneDrive folder with Tenant Name
2. Go to OneDrive Try Icon and right click on it to get the below screen.
Click on Settings >> Account tab. Click on 'Add an account' to add you Personal Microsoft Account.
It creates a folder with Personal (as shown below)
Startup activity will be created in Windows to take care of the Sync Activity.
Issue: We were using Office 365 Enterprise E5 Trial. Later got Office 365 Enterprise E3. Once the E5 Trial was expired, the icons got disappeared. Specifically, Word, Excel, One Drive and SharePoint. Tested on IE and Chrome browsers and with peers computers and all the same. Surprisingly this happened to all users.
Define Managed Paths option which is available in SharePoint 2007, SharePoint 2010, SharePoint 2013 is not available in O365 SharePoint, SharePoint Online, because we get a Site Collection and proceed from there.
Jun 01 10:50:00 TRDC1.OU.SP.COM/11.1.9.56/111.99.228.36 MSWinEventLog,4,Security,37482936,Fri Jun 01 10:50:20 2017,4740,Microsoft-Windows-Security-Auditing,SPDEVAPP1\SPFarm,N/A,Success
Audit,TRDC1.OU.SP.COM,User Account Management,,A user account was
locked out. Subject: Security ID:
S-1-5-18 Account Name: TRDC1$ Account
Domain: NT Logon ID: 0x9g8 Account
That Was Locked Out: Security ID:
S-1-5-21-787380144-786785121-371256054-14454 Account Name: SPFarm Additional Information: Caller Computer Name: SPDEVAPP1,37363918 We see log on the Domain Controller that SPFarm account was locked out. No clue what is going on. Install the below Process Monitor (Microsoft Free Tool) https://technet.microsoft.com/en-us/sysinternals/processmonitor.aspx This tool lets you to go thru the process monitor to get more details about the Account Lockout. Once you identify the Process Monitor log related to the Account lockout, open Windows Task Manager and add PID (Process Identifier) in the Processes tab. C:\Windows\system32>tasklist /FI "PID eq 5580" /FI "USERNAME eq spfarm" C:\Windows\system32>cd inetsrv
To pick the right w3wp.exe among Multiple Worker processes
Get Worker Processes ( w3wp.exe) List : Another method
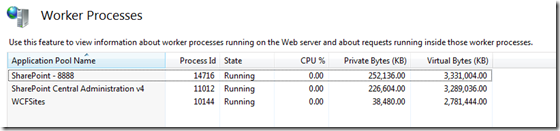
To get list of running worker process, Open IIS Manager ( Run > Inetmgr ), Select root level from left site navigation tree and from “Features View Panel” select “Worker Processes”
Click on the “Worker Processes” to get details of all worker process which are currently running as shown in below.
The Account SPFarm was getting locked with the App Pool with PID 5580. Updated the App Pool with different account and monitored for a couple of days. Everything is fine now.
Removing the SharePoint 2010 Service application can become quite a pain when the removal hasn’t work out the way it should have or when it is corrupted. In my case I am trying to remove the Corrupted Search Service Application. 1. I tried removing thru Central Admin. It took time and got timed out. No Luck. 2. Tried to remove using Powershell script, no luck. $spapp = Get-SPServiceApplication -Name "Search Service Application"
Remove-SPServiceApplication $spapp -RemoveData
3. Finally tried the STSADM command, Yeah...it worked!!!
STSADM.EXE -o deleteconfigurationobject -id "b90b7108-b808-4186-8d86-1ed1da72f3d0" NOTE: Please Open the Powershell with "Run as Administrator"
In SharePoint 2010 document libraries, the PDF’s that have been uploaded do not show the correct icon and only give you the option to save instead of opening them.
The below PowerShell script downloads a icon GIF image from Adobe named pdficon_small.gif, places it in the images folder under the 14 hive, associates it in the DOCICON.XML file, sets Browser File Handling to Permissive, and then runs IISReset.
PowerShell
$14 = "C:\Program Files\Common Files\Microsoft Shared\Web Server Extensions\14"
The PDF Key was added to the DocIcon.XML with this PDF GIF image icon file.
Browser File Handling to "Permissive" will enable the PDF’s to be opened instead of only saved.
PDF docs now have the correct icon and are allowed to be opened. Microsoft KB Article related to PDF Issue in SharePoint.
________________________________________________________________________
We can also enable opening PDF files is by adding the pdf extension to the allowed MIME types of the web application. VIEW