MC183957, Stay Informed, Published On : July 1, 2019
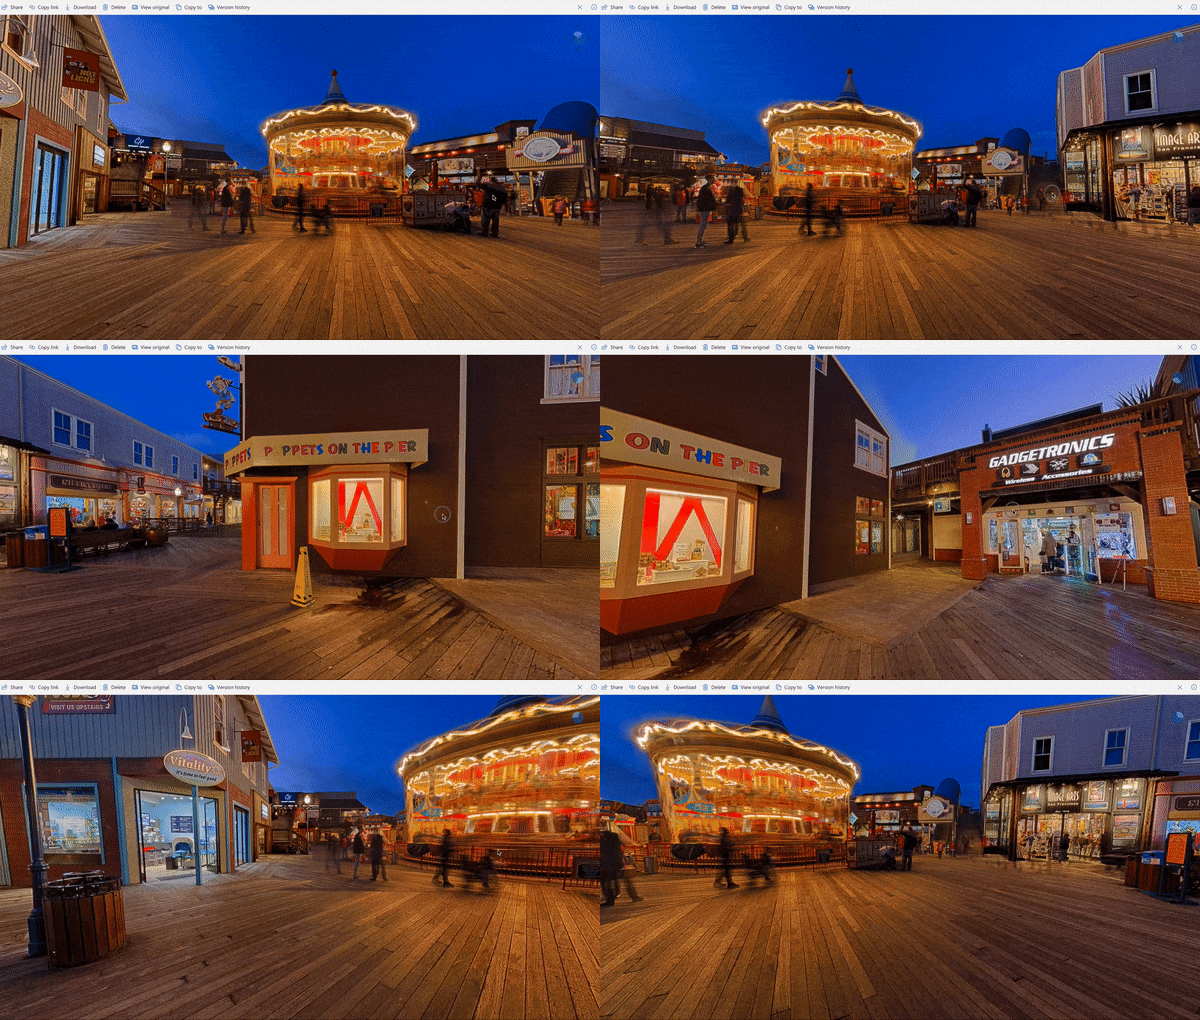
The 360-degree Image Viewer is a new Office 365 feature. We'll begin rolling this feature out soon.
This message is associated with Microsoft 365 Roadmap ID 49516.
How does this affect me? With this feature in place, customers will be able to view 360-degree photos in an interactive, panoramic manner, directly within Sharepoint and OneDrive for Business, when the photo is clicked on for detailed viewing.
Any 360-degree photos uploaded after this feature goes live (basically ones marked with a projection type of "Equirectangular") will be detected as such.
Alternatively, users can manually tag their 360-degree photos to end with ".360.jpg" or ".360.jpeg" to force activation of the 360-degree viewer, for those particular photos.
Below is a complete list of the permission levels, what they do and who they are for:
Full Control:By default, this permission level is assigned to the Owners group. Contains all available SharePoint permissions. It can't be customized or deleted. Design: Create lists and document libraries, edit pages and apply themes, borders, and style sheets on the site. Edit:By default, this permission level is assigned to the Members group. Add, edit, and delete lists; view, add, update, and delete list items and documents. Contribute: View, add, update, and delete list items and documents. Read: By default, this permission level is assigned to the Visitors group. View pages and items in existing lists and document libraries and download documents. View Only: View pages, items, and documents. Any document that has a server-side file handler can be viewed in the browser but not downloaded. File types that do not have a server-side file handler (cannot be opened in the browser), such as video files, .pdf files, and .png files, can still be downloaded. Approve: Edit and approve pages, list items, and documents. By default, the Approvers group has this permission. Manage Hierarchy: Create sites and edit pages, list items, and documents. By default, this permission level is assigned to the Hierarchy Managers group. Restricted Read: View pages and documents, but not historical versions or user permissions. Restricted Interfaces for Translation: Can open lists and folders, and use remote interfaces. Limited Access: Enables a user or group to browse to a site page or library to access a specific content item when they do not have permissions to open or edit any other items in the site or library. This level is automatically assigned by SharePoint when you provide access to one specific item. You cannot assign Limited Access permissions directly to a user or group yourself. Instead, when you assign edit or open permissions to the single item, SharePoint automatically assigns Limited Access to other required locations, such as the site or library in which the single item is located.
Lockdown mode
Limited-access user permission lockdown mode is a site collection feature that you can use to secure published sites. When lockdown mode is turned on, fine-grain permissions for the limited access permission level are reduced. The following table details the default permissions of the limited access permission level and the reduced permissions when the lockdown mode feature is turned on. Site Settings >> Site Collection features
Permission
Limited access - default
Limited access - lockdown mode
List permissions: View Application Pages
X
Site permissions: Browse User Information
X
X
Site permissions: Use Remote Interfaces
X
Site permissions: Use Client Integration Features
X
X
Site permissions: Open
X
X
Lockdown mode is on by default for all publishing sites, including if a legacy publishing site template was applied to the site collection. Lockdown mode is the recommended configuration if greater security on your sites is a requirement.
If you disable the limited-access user permission lockdown mode site collection feature, users in the "limited access" permissions level (such as Anonymous Users) can gain access to certain areas of your site.
Usually when you try to login into SharePoint Online site/site collection thru SharePoint Designer 2013 directly, it will prompt for login credentials and couldn't login thru. To avoid this, first login into SharePoint Online site/site collection using Internet Explorer.
Go to SharePoint Designer 2013, click on Open Site
Enter the Site name and click on Open. In the prompt window enter credentials and click on sign in. When Single Sign-On/ MFA is enabled, it might not prompt for credentials.
Your SharePoint Online site/site collection is opened in SharePoint Designer.
Login into https://www.office.com , you will see Office icons with OneDrive and SharePoint icons.
Adding the above test user to OneDrive access is key (as shown below). SPac >> User profiles >> Manage User Permissions. [SharePoint admins and global Admins will be able to add/access]. Conclusion 4: Enabling Office 365 Enterprise E3 (Developer) License and SharePoint Online for Developer App, user was able to login into SharePoint Online site with providing permissions and can access One Drive, also can access the office apps (Word, Excel, PowerPoint, OneNote) thru browser. _____________________________________________________________________ TEST 5: Without changing any Licences and Apps (continuing as above), Tried to login into Teams Windows app and Teams web app (as shown below).
Was unable to login into Teams Windows app, with below message.
Was unable to login into Teams web app, with below message.
Conclusion 5: Enabling Office 365 Enterprise E3 (Developer) License and SharePoint Online for Developer App, user was unable to login into Microsoft Teams Windows and web apps.
TEST 6: Without changing any Licences and Apps (continuing as above), Tried to login into Microsoft Teams SPO Site Collection with link and access provided (as shown below).
Was able to login into the Teams SPO Site Collection
Conclusion 6: Enabling Office 365 Enterprise E3 (Developer) License and SharePoint Online for Developer App, user was able to login into Microsoft Teams SPO Site Collection with link and access provided.
When you add a modern page to a site, you add and customize web parts, which are the building blocks of your page. You can connect some web parts to each other to create an interactive and dynamic experience for your page viewers. For example, you can connect a Document library web part to a File viewer web part. When a user clicks a file name in the Document library list, the File viewer shows the contents of that specific file. Or, connect a List web part or Document library web part to an Embed web part, and add custom code for a variety of dynamic experiences. Go to Site Contents >> New >> Page
Enter Page Title, click on + icon (as shown below).
First select a Document Library web part.
next add the File Viewer web part.
Note: If you're adding the File viewer web part for the first time, the Recent documents pane will open. Click Cancel on the bottom right of this pane. Click Edit web part button on the left side of the File viewer web part.
Click the ellipses (...) at the top right of the property pane, and then click Connect to source button.
Under Connect to source, select the document library you want to use from the drop down list. Click the X at the top of the pane to close it.
Click Save as draft at the top of the page. Test your connection by selecting a document from the Document library you chose. You should see the document displayed in the File viewer web part. When you're ready for your audience to see the page, click Publish at the top right of the page.
You should be able to preview the selected Document as shown below.
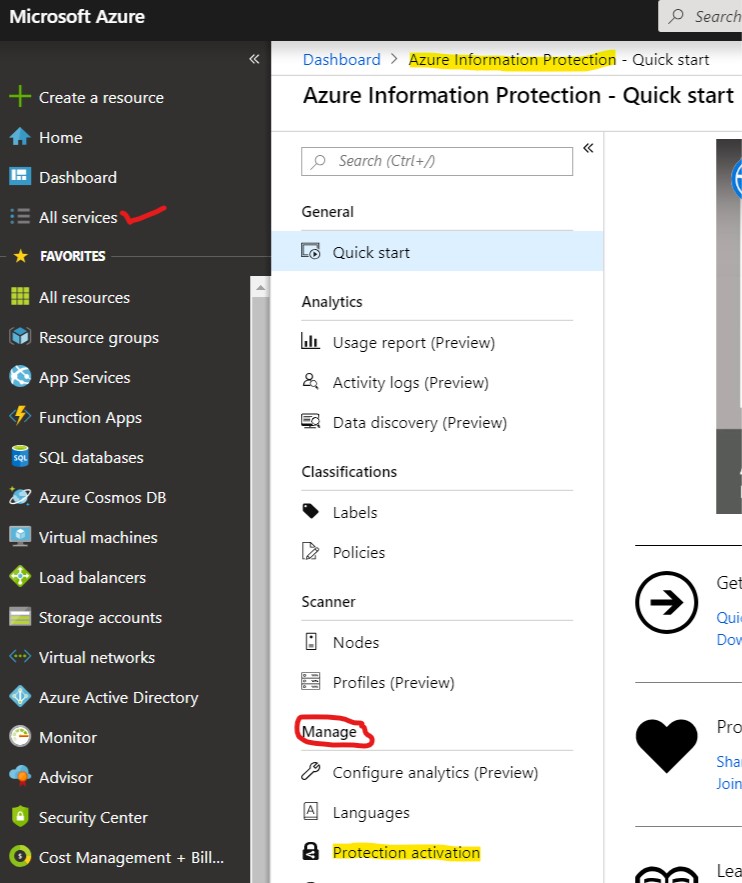
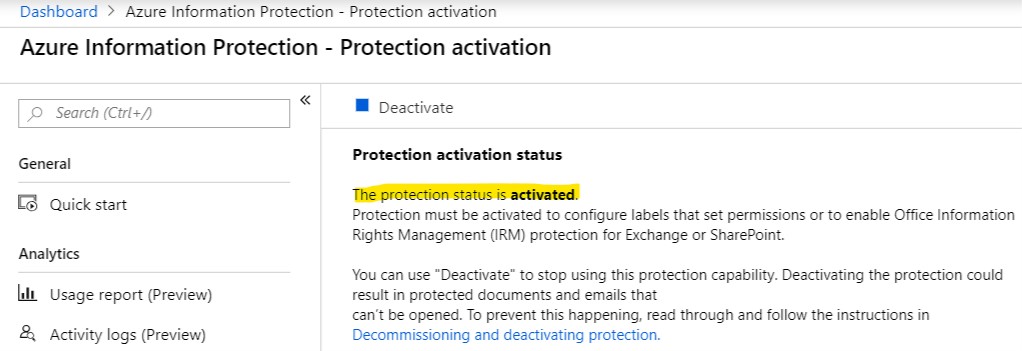
Step 1: Activate the Azure Rights Management Service (Azure RMS). You must use Office 365 global administrator privileges to enable the Azure Rights Management Service. Open a new browser window and sign in to the Azure portal. On the left menu, click All services and start typing Information in the Filter box. Select Azure Information Protection. If you haven't accessed the Azure Information Protection blade before, see the one-time additional steps to add this blade to the portal.
Sign in to Office 365 as a global admin or SharePoint admin.
Select the app launcher icon in the upper-left and choose Admin to open the Office 365 admin center. (If you don't see the Admin tile, you don't have Office 365 administrator permissions in your organization.)
In the left pane, choose Admin centers > SharePoint.
In the left pane, choose settings.
In the Information Rights Management (IRM) section, choose Use the IRM service specified in your configuration, and then Click on Refresh IRM Settings.
6. Click OK at the botton of the settings page.
After you refresh IRM settings, may take up to an hour to appear in Library Settings and List Settings. Users in your organization can begin using IRM in their SharePoint lists and document libraries. _______________________________________________________________
Step 3:Apply Information Rights Management (IRM) to a list or library
Information Rights Management (IRM) is used to help control and protect files that are downloaded from lists or libraries. To apply IRM to a list or library, you must have administrator permissions for that list or library.
Note: If you are using SharePoint Online, your users might experience timeouts when downloading larger IRM-protected files. If this happens, then apply IRM protection by using your Office programs, and store larger files in a SharePoint library that does not use IRM.
Go to the list or library for which you want to configure IRM.
On the ribbon, click the Library tab, and then click Library Settings. (If you are working in a list, click the List tab, and then click List Settings).
Under Permissions and Management, click Information Rights Management. Note: The Information Rights Management link does not appear for picture libraries.
On the Information Rights Management Settings page, select the Restrict permission to documents in this library on downloadcheck box to apply restricted permission to documents that are downloaded from this list or library.
In the Create a permission policy title box, type a descriptive name for the policy that you can use later to differentiate this policy from other policies. For example, you can type Company Confidential if you are applying restricted permission to a list or library that will contain company documents that are confidential.
In the Add a permission policy description box, type a description that will appear to people who use this list or library that explains how they should handle the documents in this list or library. For example, you can type Discuss the contents of this document only with other employees if you want to restrict access to the information in these documents to internal employees.
To apply additional restrictions to the documents in this list or library, click Show Options, and do any of the following:
To do this:
Do this:
Allow people to print documents from this list or library
Select the Allow viewers to print check box.
Allow people with at least the View Items permission to run embedded code or macros on a document.
Select the Allow viewers to run script and screen reader to function on downloaded documents check box. If you select this option, users could run code to extract the contents of a document.
Require that people verify their credentials at specific intervals. Select this option if you want to restrict access to content to a specified period of time. If you select this option, people's issuance licenses to access the content will expire after the specified number of days, and people will be required to return to the server to verify their credentials and download a new copy.
Select the Users must verify their credentials using this interval (days)check box, and then specify the number of days for which you want the document to be viewable.
Prevent people from uploading documents that do not support IRM to this list or library. If you select this option, people will not be able to upload any of the following file types: File types that do not have corresponding IRM protectors installed on all of the front-end Web servers. File types that SharePoint Server 2010 cannot decrypt. File types that are IRM protected in another program
Select the Do not allow users to upload documents that do not support IRMcheck box.
Remove restricted permissions from this list or library on a specific date.
Select the Stop restricting access to the library at check box, and then select the date that you want.
Control the interval that credentials are cached for the program that is licensed to open the document.
In the Set group protection and credentials interval, enter theinterval for caching credentials in number of days.
Allow group protection so that users can share with members of the same group.
Select Allow group protection, and enter the group's name for sharing.
After you finish selecting the options you want, click OK. _______________________________________________________________ IRM helps to protect restricted content in the following ways:
Helps to prevent an authorized viewer from copying, modifying, printing, faxing, or copying and pasting the content for unauthorized use.
Helps to prevent an authorized viewer from copying the content by using the Print Screen feature in Microsoft Windows.
Helps to prevent an unauthorized viewer from viewing the content if it is sent in e-mail after it is downloaded from the server.
Restricts access to content to a specified period of time, after which users must confirm their credentials and download the content again.
Helps to enforce corporate policies that govern the use and dissemination of content within your organization.
IRM cannot protect restricted content from the following:
Erasure, theft, capture, or transmission by malicious programs such as Trojan horses, keystroke loggers, and certain types of spyware.
Loss or corruption because of the actions of computer viruses.
Manual copying or retyping of content from the display on a screen.
Digital or film photography of content that is displayed on a screen.
Copying through the use of third-party screen-capture programs.
Copying of content metadata (column values) through the use of third-party screen-capture programs or copy-and-paste action.
IRM protection is applied to files at the list or library level. When IRM is enabled for a library, rights management applies to all of the files in that library. When IRM is enabled for a list, rights management applies only to files that are attached to list items, not the actual list items.
When people download files in an IRM-enabled list or library, the files are encrypted so that only authorized people can view them. Each rights-managed file also contains an issuance license that imposes restrictions on the people who view the file. Typical restrictions include making a file read-only, disabling the copying of text, preventing people from saving a local copy, and preventing people from printing the file. Client programs that can read IRM-supported file types use the issuance license within the rights-managed file to enforce these restrictions. This is how a rights-managed file retains its protection even after it is downloaded from the server.
The types of restrictions that are applied to a file when it is downloaded from a list or library are based on the individual user's permissions on the site that contains the file. The following table explains how the permissions on sites correspond to IRM permissions.
Permissions
IRM Permissions
Manage Permissions, Manage Web Site
Full control (as defined by the client program): This permission generally allows a user to read, edit, copy, save, and modify permissions of rights-managed content.
Edit Items, Manage Lists, Add and Customize Pages
Edit, Copy, and Save: A user can print a file only if the Allow users to print documents check box is selected on the Information Rights Management Settings page for the list or library.
View Items
Read: A user can read the document, but cannot copy or modify its content. A user can print only if the Allow users to print documents check box is selected on the Information Rights Management Settings page for the list or library.
Other
No other permissions correspond directly to IRM permissions.
When site owners enable IRM for a list or library, they can protect any supported file types in that list or library. When IRM is enabled for a library, rights management applies to all of the files in that library. When you enable IRM for a list, rights management applies only to files that are attached to list items, not the actual list items.
When people download files in an IRM-enabled list or library, the files are encrypted so that only authorized people can view them. Each rights-managed file also contains an issuance license that imposes restrictions on the people who view the file. Typical restrictions include making a file read-only, disabling the copying of text, preventing people from saving a local copy, and preventing people from printing the file. Client programs that can read IRM-supported file types use the issuance license within the rights-managed file to enforce these restrictions. This is how a rights-managed file retains its protection even after it is downloaded.
You cannot create or edit documents in an IRM-enabled library using Office Online. Instead, one person at a time can download and edit IRM-encrypted files. Use check-in and check-out to manage co-authoring , or authoring across multiple users.
When you download a PDF file from an IRM-protected library, Office 365 creates a protected PDF file. The file's extension won't change, but the file is protected. To view this file you'll need the Azure Information Protection viewer, the full Azure Information Protection client, or another application that supports viewing protected PDF files.
SharePoint Online supports encryption of the following file types:
PDF
The 97-2003 file formats for the following Microsoft Office programs: Word, Excel, and PowerPoint
The Office Open XML formats for the following Microsoft Office programs: Word, Excel, and PowerPoint
The XML Paper Specification (XPS) format
Document Library Settings >> IRM Settings in OneDrive.
Document Library Settings >>IRM Settings in Teams.