Color coding to your SharePoint list columns
We can also try this awesome FREE Tool. We need to install on the server where SharePoint is installed.While installation, this tool will verify the pre requisites.
http://www.pentalogic.net/sharepoint-products/free-stuff/html-calculated-column
We can also try this awesome FREE Tool. We need to install on the server where SharePoint is installed.While installation, this tool will verify the pre requisites.
http://www.pentalogic.net/sharepoint-products/free-stuff/html-calculated-column
MOSS 2007 setup
- Go to http://pathtosharepoint.com/Downloads/Forms/AllItems.aspx, expand the HTML Calculated Column group header and download a copy of the TextToHTML-v2.1.1 text file.
- Upload the HTML script file to a document library on your site. As you can see in the screen shot below, I uploaded my file to a document library named Site config files. It doesn't matter what document library you use to store your file, but make sure all site users have at least read-only access to the library you use. This will ensure the HTML script file can be accessed to render the color coding you’re going to set up.

- Browse the color formatting options at http://blog.pathtosharepoint.com/2008/09/01/apply-color-coding-to-your-sharepoint-lists/ and determine which option (e.g. traffic light indicator, font color shading, background shading, KPI icon indicator) you’d like to implement.
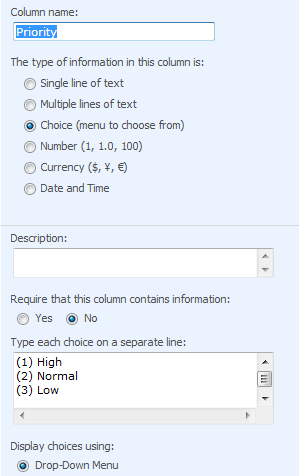
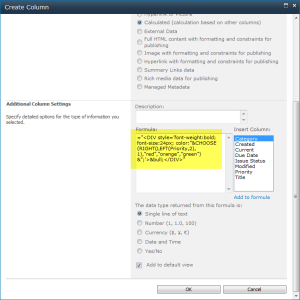
- Copy the formula provided for your desired formatting. In my case, I’m looking to implement a traffic light indicator so I copied the following formula:
="<DIV style=’font-weight:bold; font-size:24px; color:"&CHOOSE(RIGHT(LEFT(Priority,2),1),"red","orange","green")&";’>•</DIV>" - Add a new calculated column to your SharePoint list. Paste the HTML formula string you copied into the new column’s Formula field. Click OK to save your changes.
- When you return to your list view, you’ll see your new calculated column displaying with <DIV> tags. Not very attractive.
- To correct this issue, we’re going to add our HTML script to the page. Click on Site Actions > Edit Page.
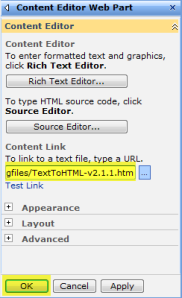
- Click Add a Web Part and add a new Content Editor Web Part to your page.
- Move your new Content Editor Web Part (CEWP) to the bottom of the page. You need it to display below your list view web part.
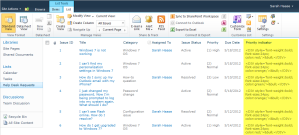
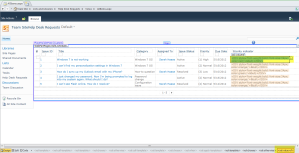
That’s it! Your formatting is applied and your page should now display your new color coded field. Here’s a screen shot of my finished view, complete with a Priority Level column that displays red, yellow and green traffic lights that correlate with the priority level of each help desk request:
Now that you've set up color coding on one list view, you can continue adding more color coding to this view or add color coding to other views. Note that you will need to add one CEWP to each list view page that you want to color code. There is no limit, however, to the number of calculated columns with HTML encoding you can add to your list.
- Browse the color formatting options at http://blog.pathtosharepoint.com/2008/09/01/apply-color-coding-to-your-sharepoint-lists/ and determine which option (e.g. traffic light indicator, font color shading, background shading, KPI icon indicator) you’d like to implement.
- Copy the formula provided for your desired formatting. In my case, I’m looking to implement a traffic light indicator so I copied the following formula:
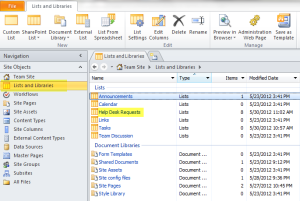
="<DIV style=’font-weight:bold; font-size:24px; color:"&CHOOSE(RIGHT(LEFT(Priority,2),1),"red","orange","green")&";’>•</DIV>" - To correct this issue, we’re going to need to modify this new calculated column. Open your site in SharePoint Designer 2010.
- Hover over the <xsl:value-of> tag until a black drop-down arrow appears. Click on the drop-down arrow and select Edit Tag…
- Click on the Quick Tag Editor box’s green check mark icon to save your changes. Your SharePoint Designer page will refresh and your color coding will appear!
- Click File > Save to save your changes.
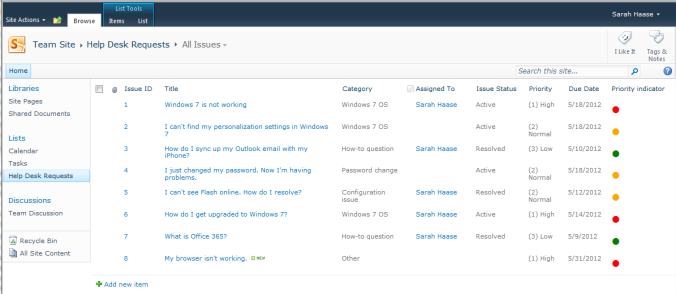
That’s it! Your formatting is applied and your page should now display your new color coded field. Here’s a screen shot of my finished view, complete with a Priority Indicator column that displays red, yellow and green traffic lights that correlate with the priority level of each help desk request:
Now that you've set up color coding on one list view, you can continue adding more color coding to this view or add color coding to other views. Note that you will need to modify the <xsl:value-of> tag for each column you want to display in HTML format. There is no limit, however, to the number of calculated columns with HTML encoding you can add to your list.





No comments:
Post a Comment